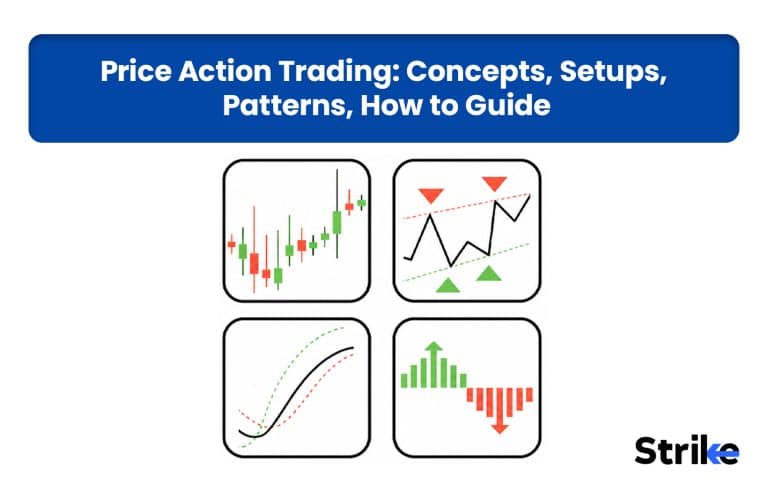
Price action trading is the most traditional form of trading, where traders look only at price movements rather than using technical indicators. Price action trading is commonly used by professional traders, as it eliminates clutter, applies to all markets and time frames, and provides a solid foundation to recognize trends, reversals, and levels of support and resistance.
Historically, its roots go back to Japanese rice merchants in the 18th century and its development with early Western charting in the 20th century; it has existed for centuries. The rise of electronic trading and the growth of algorithmic trading since the 2000s have made price action even more important as traders rely on price action to make better sense of fast-moving and complicated markets.
What is Price Action Trading?
Price action trading is a style of trading where traders make decisions entirely based on the movement of price on a chart of a selected asset. It does not involve use of any indicators; instead, it focuses on candlestick patterns, support & resistance, trend structure, and market behavior to understand the psychology of buyers and sellers.
How Does Price Action Trading Work?
Price action trading works by studying and interpreting the raw price movement directly on a chart instead of using any form of indicators. It helps traders to understand buyers’-sellers’ dynamics and spot institutional activities that move the market.
Traders read the market directly through candlestick behavior, key support and resistance levels, and market structure. This real-time reading of the market allows traders to make decisions based on what price is actually doing, not what a lagging formula says it might do.
Key Concepts in Price Action Trading
The key concepts of price action trading include support/resistance, trendlines, channels, market structure, order blocks, liquidity zones, and price imbalance. Each of these concepts gives a different piece of market information, such as identifying trend direction, spotting strong reversal areas, and understanding where large players may be active.
Support and Resistance
Support and resistance are the foundation of price action trading. It represents the key price level where most of the buying and selling happens.
- Support: A price zone or level where buying interest is high enough to halt the price from falling. When the price approaches support, strong buying pushes the price higher again. This happens because buyers who consider the asset undervalued step in, and sellers who entered short positions begin covering. The result is a reversal, or a pause in the downward move.

- Resistance: A price zone or level where selling interest is high enough to halt the price from rising. When the price approaches resistance, strong selling pushes the price lower again. This happens because sellers who considered the asset overvalued step in to short, and buyers who entered long positions begin covering. The result is a reversal from the resistance.

The support and resistance gain strength from the number of times it has been tested. The strengths of support and resistance also depend on volume and timeframe.
Trendlines and Channels
Trendlines and channels are core tools of price action trading, used to visualize market direction, momentum, and dynamic support and resistance. Unlike a horizontal support and resistance, trendlines and channels can be drawn in the direction of the trend.
- Trendlines: A trendline is a single line drawn by connecting the swing points. In an uptrend, a trendline is drawn by connecting higher lows that act as dynamic support. Whereas, in a downtrend, the trendline is drawn by connecting lower highs that act as dynamic resistance.

- Channels: A channel is aparallel corridor within which price moves in a predictable manner. The channel is created by drawing a parallel line opposite to the trendline. It helps traders to anticipate where price is likely to move next within a trend. The lower boundary of the channel acts as support, and the upper boundary of the channel acts as resistance.

When price breaks the trendline or channel, it often signals loss of momentum and possible reversal, helping traders to time entries and exits more effectively.
Market Structure
Market structure is the backbone of price action trading, as it helps define the trend and directional bias of the trend. It works by marking swing highs and swing lows on the price chart, which reflects the ongoing battle between buyers and sellers.

- Uptrend: During an uptrend, the price forms higher highs and higher lows, suggesting buyers are in control.
- Downtrend: During a downtrend, the price forms lower highs and lower lows, suggesting sellers are in control.
- Sideways Market: When price forms equal highs and equal lows, the market is considered to be range bound.
Apart from marking swing points to identify the trend of the market, there are two more important concepts in market structure, which are break of structure (BOS) and change of character (CHoCH).

- Break of Structure (BOS): It is a break of the previous structural high or low in order to continue the prevailing trend. In an uptrend, when price breaks the previous swing high in order to move up, it is called a bullish break of structure. In a downtrend, when price breaks the previous swing low, it is called a bearish break of structure.
- Change of Character: It is a break of the previous structural high or low to change the trend of the ongoing trend. When price breaks the recent swing low in an uptrend, it suggests a change in trend from bullish to bearish. When price breaks the recent swing high in an uptrend, it suggests a change in trend from bearish to bullish.
Market structure helps identify the trend of the market, while BOS helps identify trend continuation, and CHoCH helps to identify trend continuation.
Order Blocks and Liquidity Zone
Order blocks and liquidity zones are specific price areas marked on charts to identify where institutions and large participants are likely to place their orders.

- Order Block: An order block is a price area where strong buying and selling started. This area is usually the last opposite candle before a big move. A last bearish candle before a strong bullish move is considered a bullish order block, and the last bullish candle before a strong bearish move is considered a bearish order block.
- Liquidity Zone: A liquidity zone is a price area where lots of stop-loss or pending orders are placed. These areas are beyond swing highs and swing lows, around prior range boundaries, and at obvious psychological levels. In order to move price aggressively, institutions often hit these zones (stop-loss hunting) for liquidity.
Price typically moves towards the liquidity zone to sweep liquidity and collect pending orders, then reacts with the order block where institutions step in and drive the next directional move.
Price Imbalance and Fair Value Gaps (Simple Explanation)
Price imbalance is simply an order imbalance that is caused by a sudden increase or decrease in buying or selling pressure with one side (buyers or sellers) totally controlling the other. Due to this aggressive price movement, numerous orders between them remain unfilled.
A Fair Value Gap (FVG) is a visual representation of this imbalance. It usually appears when a powerful candle moves so fast that it leaves a gap between the high of the first candle and the low of the third candle, indicating that the price has skipped levels with insufficient transactions.
Price often comes to these areas to rebalance the unfilled orders and continues moving in the prevailing trend. Based on market trends, FVG can be of two types.

- Bullish FVG: Formed when price moves sharply upward, leaving an imbalance below that may later get filled.
- Bearish FVG: Formed when price drops quickly, leaving an imbalance above that price may revisit.
This helps traders avoid chasing fast moves and instead wait for high-probability entries at better prices.
Common Price Action Trading Setups
Trading setups are predefined market conditions on charts that signal potential trade opportunities. There are five major trading steps commonly used by traders, which are briefly discussed below.
1. Breakout Setup
A breakout setup involves entering a trade after price breaks a key support, resistance, or any psychological number. The breakout setup works on the idea that levels that previously stopped price from advancing are overcome, and the imbalance between buyers and sellers shifts decisively to one side.
Based on the direction of breakout, we have two types of breakout trading.

- Bullish Breakout: When price breaks above resistance, it gives a buying opportunity.
- Bearish Breakout: When price breaks below support, it gives a selling opportunity.
To trade the breakout setup, referee the steps mentioned below in the table.
| Parameter | Details |
| Entry | Enter on breakout close or on retest of breakout level (with confirmation) |
| Confirmation | Strong candle close + increase in volume |
| Stop-loss | Below breakout level (bullish) / Above breakout level (bearish) |
| Target | Measure range height and project from breakout or use 1:2 RR |
| Risk-Reward | A minimum of 1:2 preferred |
| Avoid | Entering early before confirmation (false breakout risk) |
However, it is important to note that not all breakouts are not valid. Some breakouts are just false and reverse back quickly. To avoid such a fakeout, look for a strong, decisive close of a breakout candle with good volume.
2. Rejection Setup
The rejection setup is when the price reaches near a key level but is unable to move beyond it and quickly reverses from that level. This price rejection suggests that the level is very strongly defended by the sellers or buyers. These key levels could be previous swing highs/lows, round psychological numbers, or Fibonacci retracement levels.
There are two types of rejection based on support and resistance.

- Bullish rejection: When price rejects support, it turns bullish and gives a buying opportunity.
- Bearish rejection: When price rejects resistance, it turns bearish and gives a selling opportunity.
To confirm the good rejection setup, look for a candle with a long wick (2–3 times the size of the body) or other reversal patterns.
To trade the rejection setup, referee the steps mentioned below in the table.
| Parameter | Details |
| Entry | Enter near key level after strong rejection candle (with confirmation) |
| Confirmation | Long wick rejection + strong close in opposite direction |
| Stop-loss | Above rejection high (sell) / Below rejection low (buy) |
| Target | Next support/resistance level or use 1:2 RR |
| Risk-Reward | A minimum of 1:2 preferred |
| Avoid | Trading weak rejection in choppy/sideways markets |
Sometimes what looks like a rejection is actually a stop-loss hunt by the institutions. Institutions move the price beyond the key level, triggers retail stop losses, and then snaps back sharply. This can be traded as a rejection, but only after the candle completely closes back in the range.
3. Pullback Setup
A pullback setup involves entering a trade when price temporarily moves against the trend (pullback) before continuing the main trend. It allows traders to enter at a better price and with better risk to reward.
The buying and selling opportunity depends on the prevailing trend.

- Uptrend: Price pulls back to support, giving a buying opportunity.
- Downtrend: Price pulls back to resistance, gives a selling opportunity.
To trade pullback setups, follow the steps mentioned below in the table.
| Parameter | Details |
| Entry | Enter on pullback to key level (S/R, trendline, EMA) with confirmation |
| Confirmation | Reversal candle or bounce from support/resistance |
| Stop-loss | Below pullback low (buy) / Above pullback high (sell) |
| Target | Previous swing high/low or trend continuation move (1:2 RR) |
| Risk-Reward | A minimum of 1:2 preferred |
| Avoid | Entering late or trading against the main trend |
It is very important to distinguish between a healthy pullback and a weak pullback. A healthy pullback typically retraces to 38–61.8% of its prior trend. If pullback is more than 78.6%, the pullback is weak; avoid trading such pullbacks.
4. Range Setup
Range setup is when price moves between a range of fixed high (resistance) and fixed low (support) without a clear trend. In this phase the market has no trend and keeps bouncing support and resistance, creating repeated trading opportunities. A valid range should have a minimum of 3 touch points on both sides (3 touch points on resistance and 3 touch points on support).
Traders trade range by buying at support and selling at resistance.

- Buy at support: When price reaches support in a ranging market, it’s a buying opportunity.
- Sell at resistance: When price reaches resistance in a ranging market, it’s a selling opportunity.
To trade range, follow the steps mentioned below in the table.
| Parameter | Details |
| Entry | Buy near support and sell near resistance (with confirmation) |
| Confirmation | Rejection candles or multiple touches at range boundaries |
| Stop-loss | Below support (buy) / Above resistance (sell) |
| Target | Opposite boundary of the range or use 1:2 RR |
| Risk-Reward | A minimum of 1:2 preferred |
| Avoid | Trading in the middle of the range or during strong breakout attempts |
Most traders often make the mistake of trading a very tight range. Logically a range should be at least 3 times your stop loss.
5. Trend Continuation Setup
Trend continuation setup involves entering into a trade during a pullback or temporary pause in order to ride the ongoing trend of the market. This setup allows traders to trade with the direction of the trend with controlled risk.

This setup is often backed by institutional order flow, as institutions cannot execute large orders immediately; they accumulate or distribute during each pullback. This leads to continuation of the trend once institutions are done with accumulating or distributing.
To trade trend continuation, follow the steps mentioned below in the table.
| Parameter | Details |
| Entry | On pullback to key level or breakout of consolidation pattern |
| Confirmation | Reversal candle or breakout candle in trend direction |
| Stop-loss | Below pullback low (buy) / Above pullback high (sell) |
| Target | Next swing high/low or measured move from the pattern |
| Risk-Reward | A minimum of 1:2 preferred |
| Avoid | Entering at extremes or when trend is already overextended |
A pullback trading and a trend continuation trading might sound like a similar setup, but they differ in entry approach. A pullback setup focuses only on retracement entries, while a trend continuation setup is broader, including consolidation breakouts, flags, and momentum-based entries.
Price Action Patterns and Chart Formations
Price action patterns, or chart formations, are broadly divided into two major categories, which are reversal chart patterns and continuation chart patterns. Both the categories tell the psychology of the market and order flow.
Reversal Patterns
Reversal chart patterns are price structures that suggest the possible change in market trend from bullish to bearish or from bearish to bullish. These patterns deeply reflect the shift in market psychology and help traders identify turning points in the market early.
The reversal patterns typically appear after a strong trend and follow a common structure before reversal.

- Exhaustion: Dominant side starts losing momentum.
- Consolidation: Opposite side begins to absorb the orders
- Breakout in opposite direction: The price breaks the neckline, and the trend changes.
If patterns suggest the change in trend from bullish to bearish, it is called a bearish reversal chart pattern, whereas if a chart pattern suggests the change from bearish to bullish, it is called a bullish reversal chart pattern. Some of the most popular reversal chart patterns are mentioned below in the table.
| Pattern | Type | Trend Direction | Signal | Reliability |
| Double Top | Reversal | Uptrend → Downtrend | Rejection at resistance | High |
| Double Bottom | Reversal | Downtrend → Uptrend | Strong support holding | High |
| Head & Shoulders | Reversal | Uptrend → Downtrend | Breakdown after neckline | Very High |
| Inverse Head & Shoulders | Reversal | Downtrend → Uptrend | Breakout above neckline | Very High |
| Triple Top | Reversal | Uptrend → Downtrend | Multiple rejections at resistance | Medium |
| Triple Bottom | Reversal | Downtrend → Uptrend | Multiple bounces from support | Medium |
| Rising Wedge | Reversal | Uptrend → Downtrend | Weakening upward momentum | Medium |
| Falling Wedge | Reversal | Downtrend → Uptrend | Weakening downward momentum | Medium |
There are three major steps to a trade reversal chart pattern. The steps are entry, target, and stop loss.
- Entry: After identifying a reversal chart pattern, enter the trade after the price breaks and closes beyond the neckline with good volume.
- Target: For the target, measure the height of the pattern and project it from the breakout point or 1:2 RR.
- Stop-loss: Below or above recent swing point.
Patterns are confirms only when price breaks below the neckline of the pattern
Continuation Patterns
Continuation patterns are price structures, suggesting that the ongoing market trend is likely to continue after a brief pause or consolidation. Unlike reversal patterns where power completely shifts, continuation patterns reflect a temporary equilibrium between buyers and sellers before the dominant trend regains control.
The continuation chart pattern happens in three main phases.

- Impulse Move: Dominant side is in full control.
- Consolidation: Opposite side absorbs orders and weak participants exit.
- Breakout in the same direction: The price breaks out of the consolidation, and the trend continues.
Some of the most common continuation chart patterns are mentioned below in the table.
| Pattern | Type | Trend Direction | Signal | Reliability |
| Bull Flag | Pullback | Uptrend | Brief consolidation before moving higher | High |
| Bear Flag | Pullback | Downtrend | Brief consolidation before moving lower | High |
| Bull Pennant | Consolidation | Uptrend | Tight consolidation after sharp move | High |
| Bear Pennant | Consolidation | Downtrend | Tight consolidation after sharp move | High |
| Ascending Triangle | Breakout | Uptrend | Higher lows + resistance breakout | High |
| Descending Triangle | Breakout | Downtrend | Lower highs + support breakdown | High |
The strength of the continuation chart pattern depends on the momentum of the prior impulsive move. A strong impulsive move followed by a tight consolidation often leads to a strong continuation breakout.
There are three major steps for trading continuation chart patterns. These steps are entry, stop loss, and target.
- Entry: Enter the trade when the price breaks out in the direction of the trend with good volume.
- Target: Project the size of the previous impulsive move or the height of the pattern.
- Stop-loss: Beyond consolidation pattern or swing point.
Continuation patterns help traders ride the existing trend after a brief pause, offering high-probability setups.
How to Trade Using Price Action
There are five major steps to trade using price action. These steps are briefly discussed below.
- Identify the Market Condition (Trend or Range): Understand whether the market is in a downtrend, uptrend, or sideways trend. The trend of the market can be identified by using support/resistance, trendlines, or channels or by marking higher highs/lows and lower highs/lows.

- Mark Key Zones (Support, Resistance): In a trending market, mark the support and resistance using a trendline. Whereas, for sideways market markups, draw the support and resistance using horizontal lines.

- Wait for Confirmation: Wait for the price to come near the support or resistance. Do not enter immediately after the price touches support or resistance. Wait for the price to form a reversal candlestick or chart pattern near support or resistance.

- Execution: Enter the trade after pattern confirmation and place the stop-loss beyond the structure. For a target, aim for the next key level.

- Trade Management: Trail the stop loss below or above swing points. You can also trail a stop loss using a trendline. Once the trendline breaks, exit the trade.
In price action trading, trend gives direction, zones give location, and confirmation gives entry, while a well-placed stop loss based on market structure helps manage the trade. Using a stop loss consistently ensures that the structure of your risk management remains intact while you follow the market’s direction.
Best Timeframes for Price Action Trading
The best timeframe for trading price action depends on your style of trading, as price action is followed across all timeframes and asset types. However, higher timeframes, such as 4 hrs, daily, and weekly, are considered to be more reliable due to their clear market structure and less noise. Whereas lower timeframes like 5-minute or 15-minute create more noise but are mostly used for precise entries after identifying direction on higher timeframes.
The best suitable timeframe for price action trading based on style of trading is mentioned below in the table.
Here is a clean, well-formatted version:
| Timeframe | Type | Bars Per Day | Typical Hold Time |
| 1M / 5M | Scalping | Hundreds | Seconds – minutes |
| 15M / 30M | Day Trading | 16–96 | Minutes – hours |
| 1H / 4H | Swing Trading | 6–24 | Hours – days |
| Daily (D1) | Swing / Position | 1 | Days – weeks |
| Weekly (W1) | Position Trading | 1/week | Weeks – months |
This structure helps traders align their strategy with time commitment, risk, and trade frequency.
Advantages and Disadvantages of Price Action Trading
The advantages and disadvantages of action trading are discussed below in the table.
| Advantages | Disadvantages |
| Simple and clean approach (no heavy indicators) | Requires experience and strong chart-reading skills |
| Provides real-time market insight (no lag) | Subjective interpretation can lead to different views |
| Works on all timeframes and markets | Difficult for beginners to master |
| Helps understand true buyer-seller dynamics | False signals in choppy or sideways markets |
| Flexible and can be combined with other strategies | Requires patience and discipline for confirmation |
Price action trading offers a clean, flexible, and insightful way to understand the market, but it demands experience, patience, and strong decision-making skills to use it effectively and consistently.
How to Manage Risk in Price Action Trading
There are six ways to manage risk in price action trading, which are briefly discussed below.
- Use a proper stop-loss: Always place a stop-loss to avoid major losses in case the price turns against you. Consider placing stop-loss based on market structure, not randomly. In an uptrend, put a stop-loss below the swing low, while in a downtrend, put a stop-loss above the swing high.
- Risk Only a Small Amount Per Trade: Never risk more than 2 to 4% of your entire capital. This will protect the capital even in serious drawdown phases.
- Maintain a Good Risk to Reward: Before entering the trade, make sure that the potential reward (profit) should be higher than the risk you are taking. The most commonly used risk-to-reward is 1:2, where your profit is two times your loss.
- Avoid Overtrading: Avoid trading everything you see. Wait for clear price action at key levels instead of forcing trades. It is important to know that more trades are not equal to more profits.
- Trade only quality setups because not every setup is worth trading.
- Follow Market Structure: Always align your trade with the market direction. Trading against the market increases the probability of loss.
- Actively manage the trade: Keep trailing the stop-loss and book partial profits as the trade progresses.
Risk management in price action trading is about protecting capital, controlling losses, and trading only high-quality setups, which ultimately leads to consistency and long-term survival in the market.
Is Price Action Trading Profitable?
Yes, price action trading is profitable, but the probability of winning depends entirely on trading skills, discipline, and risk management. Across the globe, nearly 70-90% of retail traders incur loss. As per SEBI data, only 7.2% of retail derivative traders were profitable.
However, the high failure of retail trades does not mean that price action is a failure; it reflects poor risk execution. This data shows that price action trading is a profitable method, but only when executed with discipline and risk management.
Is Price Action Better than Indicator-Based Trading?
Price action is not necessarily better than indicator-based trading. It all depends on the trader’s trading style, his market understanding, and years of experience.
Price action is leading in nature and gives traders real-time market insights without any lag. On the other hand, indicators are mostly lagging but simplify price movement and provide structured signals, which can be helpful for beginners.
Many experienced traders use price action as a foundation for analysis and use specific Types of Indicators for confirmation or to get additional insights. By understanding how various Types of Indicators, such as oscillators or trend-following tools, complement price action, traders can build a more comprehensive and reliable trading strategy.
Price Action Trading vs Trend Trading vs Swing Trading
The key difference between price action trading, trend trading, and swing trading is mentioned below in the table.
| Aspect | Price Action Trading | Trend Trading | Swing Trading |
| Core Idea | Reads raw price movement and structure | Follows overall market trend direction | Captures short- to medium-term price swings |
| Focus | Buyer-seller behavior, key levels | Identifying and riding trends | Entering at pullbacks within swings |
| Tools Used | Candlestick patterns, S/R, structure, liquidity | Moving averages, trendlines, indicators | Support/resistance, indicators, patterns |
| Timeframe | All timeframes | Medium to higher timeframes | 1H to Daily mostly |
| Holding Period | Flexible (scalp to positional) | Days to weeks | Hours to days |
| Entry Style | Based on price reaction and confirmation | Enter on-trend confirmation or pullbacks | Enter at swing highs/lows or retracements |
| Complexity | Requires strong chart-reading skills | Relatively simple with indicators | Moderate, mix of price and indicators |
| Best For | Traders who prefer clean charts and logic | Traders who prefer trend-following | Traders who want fewer but planned trades |
Price action trading focuses on reading market behavior, trend trading follows the overall direction, and swing trading captures short-term moves.


 Previous Article


![15 Investing.com Alternatives [Free+Paid] You Should Use in 2026](https://www.strike.money/wp-content/uploads/2026/04/Investing.com-Alternatives.jpg "15 Investing.com Alternatives [Free+Paid] You Should Use in 2026 80")
![15 TradeStation Alternatives [Free+Paid] You Should Use in 2026](https://www.strike.money/wp-content/uploads/2026/04/TradeStation-Alternatives.jpg "15 TradeStation Alternatives [Free+Paid] You Should Use in 2026 81")
![15 Chartink Alternatives [Free+Paid] You Should Use in 2026](https://www.strike.money/wp-content/uploads/2026/04/Chartlink-Alternatives.jpg "15 Chartink Alternatives [Free+Paid] You Should Use in 2026 82")
: Overview, 10 Types of Indicators, Settings for Different Markets 83")


 : Definition, Formula, calculation, Uses, Advantages Vs limitations 86")


No Comments Yet.